
The time had finally, a year later than originally planned, to start the upgrade, things were nearly ready, the new boards and firmware were working well enough to get them into the Chicken Coop, but one fairly significant blocker still remained. The state of the Chicken Coop itself.
This needed careful planning. Unlike the first time around, where I had an old coop and a new coop and cut-over was simply preparing the new coop with the wood preservatives, waiting for it to dry, then swapping the units over followed by the installation of the electronics. This time, its a live upgrade - literally as the hens need somewhere dry and safe to roost for the night, each night during the upgrade, but the maintenance list is quite long and will take several consecutive days of dry weather. It needs :
- A clean-out to get the usual weekly chicken poo, straw and mud out, this is fairly simple due to the use of rubber mats cut to size in the main coop and the nesting boxes
- The base unit needs to be removed and cleaned, its perspex is muddy, the wood is showing signs of decay. in places.
- The roof is leaking above the pophole door, thanks to a couple of branches that came off the tree above the coop, which in turn took out the main door motor over the previous winter.
- The old electronics needs to be removed, returning it to a manually operated coop.
- Inside the coop is dirty as the normal spring clean with the pressure washer hasn't been done yet.
My ABS enclosures really do get tested to their IP66 rating, at least once a year. - Looking at the inside of the coop, there are some signs of decay, with some black discolouration on the wood in places
- The whole coop needs at least two coats of wood preservative across the whole inside and outside, partly to make it look fresher and partly to protect the wood more and partly to make it inhospitable to red mites again.
But, although its 9:20 in the morning, you can't start fully yet, since all the girls want to go and lay their egg between now and around mid day, but that doesn't give me enough time to do all the preparation work I want to do this weekend either. I had attempted, several days before, to remove one of the nesting boxes so that they could be cleaned and made ready during the upgrade for the girls to use and in the process, and making the coop lighter to handle at the same time. However that just resulted in a damaged nest box and more repair work. This is why the left side looks a bit of a different colour in the following pictures.
A compromise had to be made was made in regard to nest boxes during the upgrade as did what to do with the Chickens, since they would be in the way and some would inevitably get hurt due to their inquisitive nature, so they had to be let loose on in the garden and the dog was under strict orders to leave them alone, which he did. Alternative cardboard and plastic nesting boxes were provided. Yes, this is highly unusual to your average chicken and plenty of dialogue towards me occurred, which it seems, in retrospect was advising me that they would not use those and will lay the eggs under a couple of plants in the garden instead. I just need to figure out which ones they had selected. I need to get started, summer is nearly here, the weather is good and I'm already a year later than I wanted to be in doing the upgrade, but here we are nonetheless, so lets get on.
The next problem is that these jobs, although not difficult, need good dry weather with a breeze and ideally some sunlight, so that the wood dries out, but I'm going to make it really wet during cleaning and once clean, the chickens will be in and out of it, during the afternoon, when I stop until the next day. In the process, they will make it dirty again, since the ground is not fully dry yet as its only May. The wood preservative needs fully dry wood, a good windy day so that it can dry out and all of this works best when the roof is removed as it gives easy access, but on the flip side, the girls still need safe and secure roosting space in the evening - irrespective of what has happened during the day and how many problems I encounter.
The coop is stripped back externally, the mesh that prevents the chickens flying up on top of the coop, where the solar panel lives must be removed, the solar panel must be removed, the coop its self must be removed from the base unit and the base unit taken out of the pen, so we get more space and a coop that is easier to work on from above. The main unit is now supported on a couple of bricks to keep it off the muddy pen floor. I am also considering using the base unit and / or the greenhouse as alternative accommodation, should things go wrong. These are not ideal, but are the only viable options other than letting the hens camp out in the various bushes and shrubs, which they would be more than happy to do as well.
The front panel
After a quick clean-out of the mats to get rid of most of the mud, poo and straw, I can start removing the old electronics, I can do that whilst the girls are laying. Here is the old front panel, its very simple, a tricolour LED in the centre for overall system status. This was for the HEN 9000 throbbing LED approach I wanted. Below that, there are 3 traffic light LED's for power, charger and battery status. There is a 433MHz radio unit bottom right with its aerial, a light sensor on the right and a temperature sensor on the left, plus two connectors for the buttons that are on the front panel. This unit has weathered well, even though it takes the full English weather. The screws were rusty though which showed me what sort of disassembly I was heading into.
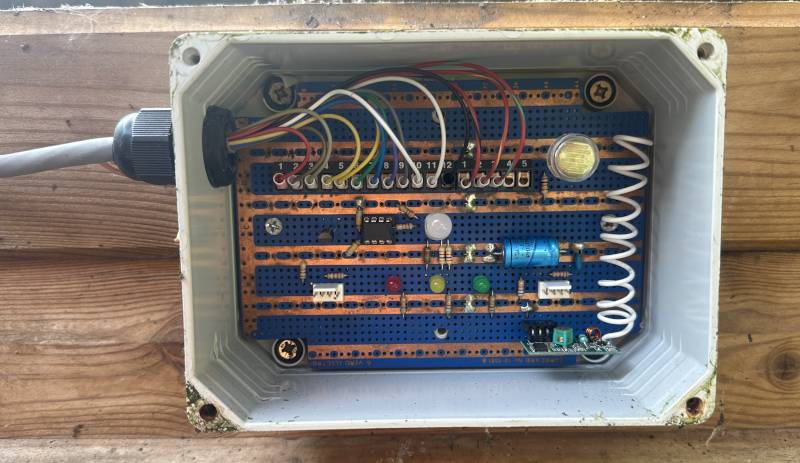
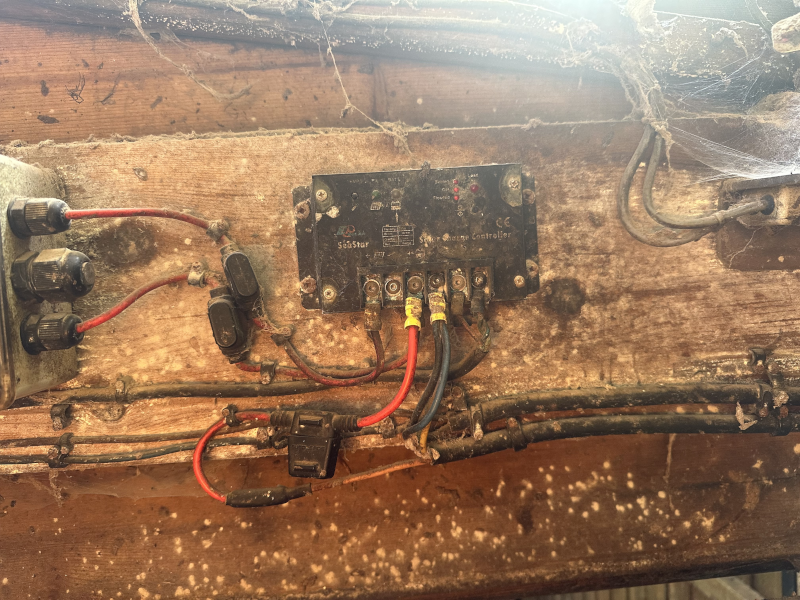
Charge controller
The solar charge controller, although a sealed unit, with silicon potting in it, still gets quite dirty. The white on the wood is the Diatomaceous earth that is used to control mites. There are also cobwebs everywhere, plus the spiders prey dotted around. The webs look worse due to them also having Diatomaceous earth in them.
Power sensing
The power sensing module has suffered a similar fate, and being in a corner, there are more cobwebs and creepie crawlies.
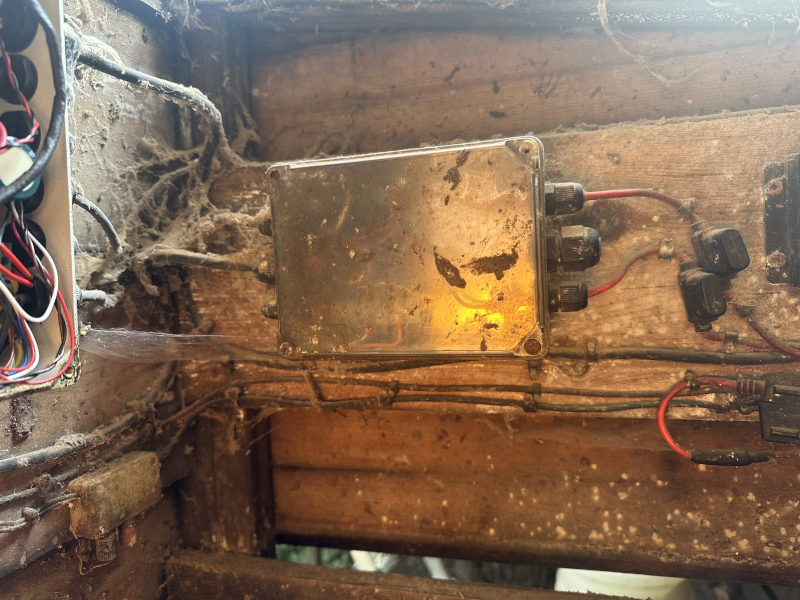
The main unit
The main unit has survived remarkably well, all things considered, but the outside has plenty of cobwebs that are difficult to remove, without impacting the cable glands, which may then leak, this is due to very small amounts of free space to be able to get tools in to clean things with.
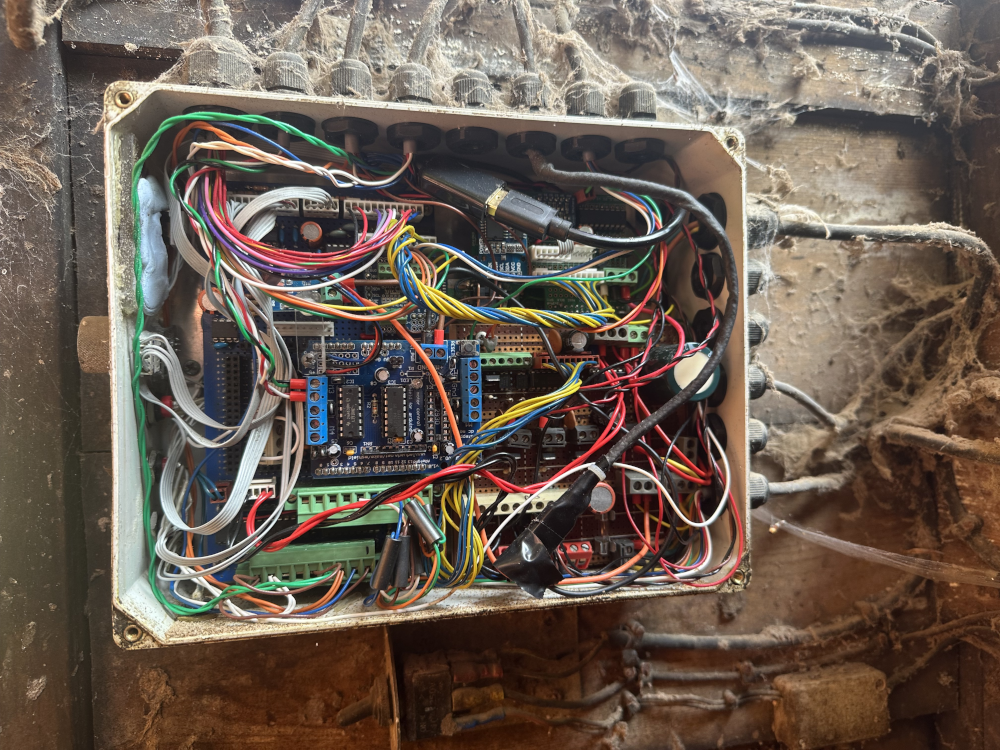
The impact of the failed front seal / distorted box can be seen on the inside bottom of the case, with the dark dusty material that has ingressed. The difficulty in maintainability can also be seen, due to the prototype nature of this version 1 system. As there is no PCB, many of the cables are directly routed to the control module that feeds them, so stripping down and re-assembling the unit takes a long time as each wire must be removed and replaced later in the same place. The push in larger green screw terminals help, but there are still many Ground and other signals that require manual removal and reinstallation.
The new boards will resolve all of these problems due to the design of the PCB. If you want to understand what the various bits do, take a look at the version 1 build process
The pophole motor
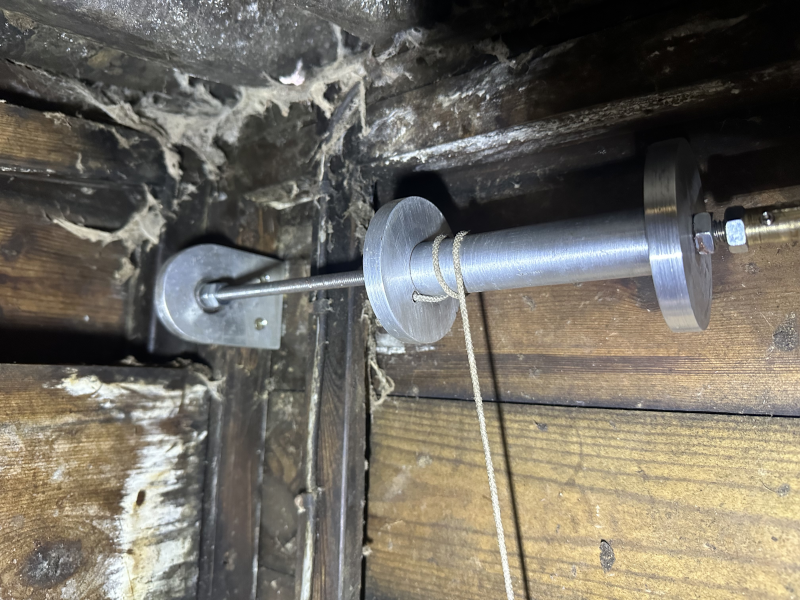
The leaking roof by the pophole motor can be seen by the black, both on the roof and the woodwork, The Aluminium lifting mechanism is clean, since it was only removed, cleaned and repaired a couple of months ago, when the motor failed due to water ingress. This assembly will be re-used as-is.
Removal of the old modules was difficult, due to rusty screws and fixings, cable clips were also problematic as they had rusted into the wood and were very difficult to remove, but everything came out one way or the other in the end and now we are back to having an ordinary manual chicken coop and the real maintenance can start, along with the early mornings to let the hens out each day.
A longstanding problem
One interesting point that happened during the removal process is that the two connector boxes which terminate all the reed switches that sense the pophole door - one on the left side and one on the right side, turned out to be the root cause of a longstanding problem. The door sensing had been odd for several months and diagnostics was always inconclusive. I had been unable to get into the old boxes, since the screws were rusted out and the boxes, they were not removable without damage to the boxes. Further, being old ABS plastic without any hermetic seals, they would not re-seal if I managed to get them open, so I had to leave them as they were, knowing that they would soon be replaced. Opening one up with an oscillating saw to chop through the fixings resulted in water coming out of the box, so even though the rubber grommet at the top appeared to be OK, either it or one of side grommets had failed and water that could get in on the seal further up, was unable to exit further down. Why do things always fail in this manner and never in a way that gives a positive outcome.